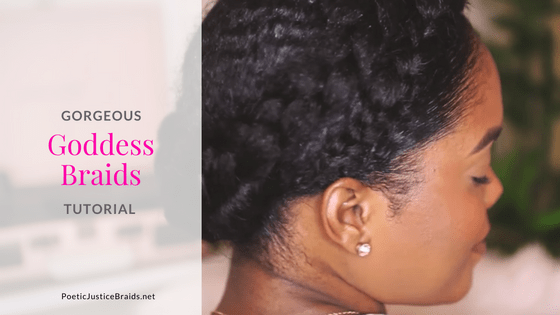
Gorgeous Goddess Braids in Six Easy Steps
Goddess braids are an easy updo for a pulled-together daytime or evening look. Plus, they’re a protective style that’s easy to achieve on a budget. This tutorial will show you a wrap-around goddess braids look that you’ll love.
Here’s what you’ll need:
- Comb & boar bristle brush
- Styling gel
- Synthetic braiding hair
- Ponytail holders
- Bobby pins
Step 1: Put hair in two low braided ponytails
Start with freshly washed, conditioned and detangled hair. Part hair down the center and place in two low ponytails. Ponytails should be as close to the nape of the neck as possible. Secure with ponytail holders. Smooth with gel and boar bristle brush. Split each ponytail into two sections and braid each. Clip ends to secure braids until step 3.
Step 2: Wrap braiding hair around base of ponytail
Find the mid-point of the braiding hair and connect to the base of one ponytail. Twist 2-3 times to secure and clip to hold out of the way of the natural hair.
Step 3: Pin natural braids flat to the back of head
With the braiding hair pinned out of the way, pin your natural braided hair flat to the back of your head. Pull one pair of braids toward the opposite ponytail and secure with pins. Repeat on the other side. Your natural braids will be covered by the goddess braids.
Step 4: Create the goddess braid
Divide braiding hair into three sections and braid loosely to the end. Don’t worry about braiding them tightly; your goddess braids should be fluffy and large.
Step 5: Wrap goddess braids around your head
Wrap the goddess braids around the back of your head, covering the natural braids. Continue to wrap around your head. Tuck and pin to secure ends. These braids should create a halo around your head.
Step 6: Finish your look look
Make sure your goddess braids are connected together and that they completely cover the natural braids at the back of your head. Pin the two braids together around your head and position it exactly where you want it. This should result in a seamless-looking braid that creates a halo around your head. Finish with jewelry, flowers or other embellishments to fit your style.
We love the way that Mini Marley on YouTube takes you through this look step by step. Check out her video below!


